目录 概述 起步依赖 自动配置 基于 Java 代码的 Bean 配置 自动配置条件依赖 Bean 参数获取 Bean 的发现 Bean 到加载 自动配置总结 自定义 starter 使用 starter Spring Boot 大大简化了项目初始搭建以及开发过程,而这些都是通过 Spring Boot 提供的 starter 来完成的,一个项目中的基础模块本质就是一个 Starter,本文主要对 Spring boot 的 starter 进行比较全面深入的记录。
概述 spring boot 在配置上相比 spring 要简单许多, 其核心在于 spring-boot-starter, 在使用 spring boot 来搭建一个项目时, 只需要引入官方提供的 starter, 就可以直接使用, 免去了各种配置。starter 简单来讲就是引入了一些相关依赖和一些初始化的配置。
Spring 官方提供了很多 starter,第三方也可以定义 starter。为了加以区分,starter 从名称上进行了如下规范:
Spring 官方提供的 starter 名称为:spring-boot-starter-xxx,例如 Spring 官方提供的 spring-boot-starter-web 第三方提供的 starter 名称为:xxx-spring-boot-starter,例如由 mybatis 提供的 mybatis-spring-boot-starter Spring Boot 之所以能够帮我们简化项目的搭建和开发过程,主要是基于它提供的起步依赖和自动配置
起步依赖 起步依赖其实就是将具备某种功能的坐标打包到一起 ,可以简化依赖导入的过程。例如,我们导入 spring-boot-starter-web 这个 starter,则和 web 开发相关的 jar 包都一起导入到项目中了。如下图所示:
自动配置 自动配置,就是无须手动配置 xml,自动配置并管理 bean,那么 Spring Boot 是如何完成自动配置的尼?
基于 Java 代码的 bean 配置 激动配置条件依赖 Bean 参数获取 Bean 的发现 Bean 的加载 接下来以Mybatis-spring-boot-starter来说明自动配置的实现过程
基于 Java 代码的 Bean 配置 当我们在项目中导入了mybatis-spring-boot-starter这个 jar 后,可以看到它包括了很多相关的 jar 包
1 2 3 4 5 <dependency > <groupId > org.mybatis.spring.boot</groupId > <artifactId > mybatis-spring-boot-starter</artifactId > <version > 1.3.2</version > </dependency >
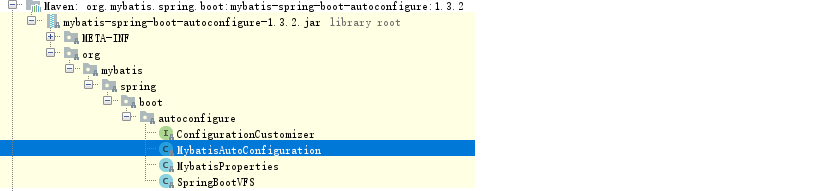
其中在 mybatis-spring-boot-autoconfigure 这个 jar 包中有如下一个MybatisAutoConfiguration 自动配置类
打开这个类,关键代码如下:
1
2
3
4
5
6
7
8
9
10
11
12
13
@Configuration @ConditionalOnClass({SqlSessionFactory.class, SqlSessionFactoryBean.class}) @ConditionalOnBean({DataSource.class}) @EnableConfigurationProperties({MybatisProperties.class}) @AutoConfigureAfter({DataSourceAutoConfiguration.class}) public class MybatisAutoConfiguration { @Bean @ConditionalOnMissingBean public SqlSessionFactory sqlSessionFactory (DataSource dataSource) throws Exception{...} @Bean @ConditionalOnMissingBean public SqlSessionTemplate sqlSessionTemplate (SqlSessionFactory sqlSessionFactory) {...} }
@Configuration 和 @Bean 这两个注解一起使用就可以创建一个基于 java 代码的配置类,可以用来替代传统的 xml 配置文件,两个注解具体的含义如下:
注解 含义 @Configuration在类上标注,表明当前类是一个配置类 @Bean表明需要向 Spring IoC 容器中注入的 Bean
所以上面的MybatisAutoConfiguration 这个类,自动帮我们生成了 SqlSessionFactory 和 SqlSessionTemplate 这些 Mybatis 的重要实例并交给 spring 容器管理,从而完成 bean 的自动注册
自动配置条件依赖 从MybatisAutoConfiguration这个类中使用的注解可以看出,要完成自动配置是有依赖条件的
1
2
@ConditionalOnClass({SqlSessionFactory.class, SqlSessionFactoryBean.class}) @ConditionalOnBean({DataSource.class})
所以要完成 Mybatis 的自动配置,需要在类路径中存在SqlSessionFactory、SqlSessionFactoryBean这两个类,同时需要存在 DataSource 这个 bean 且这个 bean 完成自动注册
Spring boot 中常见的条件依赖注解有:
注解 功能说明 @ConditionalOnBean仅在当前上下文中存在某个 bean 时,才会实例化这个 Bean @ConditionalOnClass某个 class 位于类路径上,才会实例化这个 Bean @ConditionalOnExpression当表达式为 true 的时候,才会实例化这个 Bean @ConditionalOnMissingBean仅在当前上下文中不存在某个 bean 时,才会实例化这个 Bean,防止重复创建 @ConditionalOnMissingClass某个 class 在类路径上不存在的时候,才会实例化这个 Bean @ConditionalOnNotWebApplication不是 web 应用时才会实例化这个 Bean @AutoConfigureAfter在某个 bean 完成自动配置后实例化这个 bean @AutoConfigureBefore在某个 bean 完成自动配置前实例化这个 bean
Bean 参数获取 要完成 mybatis 的自动配置,需要我们在配置文件中提供数据源相关的配置参数,例如数据库驱动、连接 url、数据库用户名、密码等。那么 spring boot 是如何读取 yml 或者 properites 配置文件的的属性来创建数据源对象的?
在我们导入 mybatis-spring-boot-starter 这个 jar 包后会传递过来一个 spring-boot-autoconfigure 包,在这个包中有一个自动配置类DataSourceAutoConfiguration ,如下所示:
1
2
3
4
5
@Configuration @ConditionalOnClass({DataSource.class, EmbeddedDatabaseType.class}) @EnableConfigurationProperties({DataSourceProperties.class}) @Import({Registrar.class, DataSourcePoolMetadataProvidersConfiguration.class}) public class DataSourceAutoConfiguration {}
上面这个类加入了EnableConfigurationProperties注解,DataSourceProperties 这个类如下:
1
2
3
4
@ConfigurationProperties( prefix = "spring.datasource" ) public class DataSourceProperties implements BeanClassLoaderAware , EnvironmentAware, InitializingBean {}
上面这个类上加入了ConfigurationProperties 注解,这个注解的作用就是把 yml 或者 properties 配置文件中的配置参数信息封装到ConfigurationProperties 注解标注的 bean(即DataSourceProperties )的相应属性上。
@EnableConfigurationProperties注解的作用是使@ConfigurationProperties注解生效,并且将@ConfigurationProperties标注的 Bean 注入到 @EnablelConfigurationProperties类中。
如下例所示,最终 DataSourceProperties 类将注入到 DataSourceAutoConfiguration中使用,随后 Spring 将根据DataSourceAutoConfiguration类中的配置,自动注入新的 Bean
1
2
3
4
5
@Bean @ConditionalOnMissingBean public DataSourceInitializer dataSourceInitializer (DataSourceProperties properties, ApplicationContext applicationContext) { return new DataSourceInitializer (properties, applicationContext); }
Bean 的发现 spring boot 默认扫描启动类所在的包下的主类与子类的所有组件,但并没有包括依赖包中的类,那么依赖包中的 bean 是如何被发现和加载的?
一般 Spring boot 应用程序的启动类都有 @SpringBootApplication 注解,这个注解的源码如下:
1
2
3
4
5
6
7
8
9
10
11
12
13
14
15
16
@Target({ElementType.TYPE}) @Retention(RetentionPolicy.RUNTIME) @Documented @Inherited @SpringBootConfiguration @EnableAutoConfiguration @ComponentScan( excludeFilters = {@Filter( type = FilterType.CUSTOM, classes = {TypeExcludeFilter.class} ), @Filter( type = FilterType.CUSTOM, classes = {AutoConfigurationExcludeFilter.class} )} ) public @interface SpringBootApplication {...}
其中比较重要是下面这三个注解:
@SpringBootConfiguration:作用就相当@Configuration注解,被注解的类将成为一个 bean 配置类@ComponentScan:作用就是自动扫描并加载符合条件的组件,最终将这些 bean 加载到 spring 容器中@EnableAutoConfiguration:这个注解很重要,借助@Import的支持,收集和注册依赖包中相关的 Bean 定义继续追踪@EnableAutoConfiguration注解源码,这个注解引用了@Import注解,@Import注解能够导入需要自动配置的组件,此处就自动导入类EnableAutoConfigurationImportSelector
1
2
3
4
5
6
7
8
9
10
11
12
13
@Target({ElementType.TYPE}) @Retention(RetentionPolicy.RUNTIME) @Documented @Inherited @AutoConfigurationPackage @Import({EnableAutoConfigurationImportSelector.class}) public @interface EnableAutoConfiguration { String ENABLED_OVERRIDE_PROPERTY = "spring.boot.enableautoconfiguration" ; Class<?>[] exclude() default {}; String[] excludeName() default {}; }
EnableAutoConfigurationImportSelector类的源码如下,由于如今这个类已经被弃用,所哟详细的细节查看父类AutoConfigurationImportSelector
1
2
3
4
5
6
7
8
public class EnableAutoConfigurationImportSelector extends AutoConfigurationImportSelector { public EnableAutoConfigurationImportSelector () { } protected boolean isEnabled (AnnotationMetadata metadata) { return this .getClass().equals(EnableAutoConfigurationImportSelector.class) ? (Boolean)this .getEnvironment().getProperty("spring.boot.enableautoconfiguration" , Boolean.class, true ) : true ; } }
AutoConfigurationImportSelector类中比较重要的是getCandidateConfigurations方法
1
2
3
4
5
6
7
8
9
public class AutoConfigurationImportSelector implements DeferredImportSelector , BeanClassLoaderAware, ResourceLoaderAware, BeanFactoryAware, EnvironmentAware, Ordered { protected List<String> getCandidateConfigurations (AnnotationMetadata metadata, AnnotationAttributes attributes) { List<String> configurations = SpringFactoriesLoader.loadFactoryNames(this .getSpringFactoriesLoaderFactoryClass(), this .getBeanClassLoader()); Assert.notEmpty(configurations, "No auto configuration classes found in META-INF/spring.factories. If you are using a custom packaging, make sure that file is correct." ); return configurations; } }
getCandidateConfigurations() 方法中调用了 SpringFactoriesLoader 类的 loadFactoryNames 方法,继续跟踪源码:
1
2
3
4
5
6
7
8
9
10
11
12
13
14
15
16
17
18
19
public static List<String> loadFactoryNames (Class<?> factoryClass, ClassLoader classLoader) { String factoryClassName = factoryClass.getName(); try { Enumeration<URL> urls = classLoader != null ? classLoader.getResources("META-INF/spring.factories" ) : ClassLoader.getSystemResources("META-INF/spring.factories" ); ArrayList result = new ArrayList (); while (urls.hasMoreElements()) { URL url = (URL)urls.nextElement(); Properties properties = PropertiesLoaderUtils.loadProperties(new UrlResource (url)); String factoryClassNames = properties.getProperty(factoryClassName); result.addAll(Arrays.asList(StringUtils.commaDelimitedListToStringArray(factoryClassNames))); } return result; } catch (IOException var8) { throw new IllegalArgumentException ("Unable to load [" + factoryClass.getName() + "] factories from location [" + "META-INF/spring.factories" + "]" , var8); } }
以上 SpringFactoriesLoader的loadeFactoryNames静态方法可以从所有的 jar 中读取 META_INF/spring.factories文件,而自动装配的类就在这个文件汇总进行配置
例如,Mybatis-spring-boot-starter中就有此文件,如下图:
其中的内容如下:
1
2
3
# Auto Configure org.springframework.boot.autoconfigure.EnableAutoConfiguration=\ org.mybatis.spring.boot.autoconfigure.MybatisAutoConfiguration
这样 Spring Boot 就可以加载到 MybatisAutoConfiguration 这个配置类了
Bean 到加载 在 Spring Boot 应用中要让一个普通类交给 Spring 容器管理,通常有以下方法:
使用@Configuration与@Bean 注解 使用@Controller、@Service、@Repository、@Component 注解标注该类并且启用@ComponentScan自动扫描 使用@Import注解以及对应的方法 其中 Spring Boot 实现自动配置使用的是@Import注解这种方式,AutoConfigurationImportSelector类的selectImports方法返回一组从META-INF/spring.factories文件中读取的bean的全类名,这样 Spring Boot 就可以加载到这些 Bean 并完成实例的创建工作
自动配置总结 📓 自动配置的关键几步以及相应的注解总结如下:
@Configuration 与@Bean:基于 Java 代码的 bean 配置 @Conditional:设置自动配置条件依赖 @EnableConfigurationProperties 与@ConfigurationProperties:读取配置文件转换为 bean @EnableAutoConfiguration 与@Import:实现 bean 发现与加载 自定义 starter 本小节通过自定义 starter 来加强之前的知识
创建 starter 工程 hello-spring-boot-starter 并配置 pom.xml 文件 1 2 3 4 5 6 7 8 9 10 11 12 13 14 15 16 17 18 19 20 21 22 23 24 25 26 27 28 29 30 <?xml version="1.0" encoding="UTF-8" ?> <project xmlns ="http://maven.apache.org/POM/4.0.0" xmlns:xsi ="http://www.w3.org/2001/XMLSchema-instance" xsi:schemaLocation ="http://maven.apache.org/POM/4.0.0 http://maven.apache.org/xsd/maven-4.0.0.xsd" > <modelVersion > 4.0.0</modelVersion > <groupId > com.pineappleman</groupId > <artifactId > hello-spring-boot-starter</artifactId > <version > 1.0-SNAPSHOT</version > <parent > <groupId > org.springframework.boot</groupId > <artifactId > spring-boot-starter-parent</artifactId > <version > 2.2.2.RELEASE</version > <relativePath /> </parent > <properties > <maven.compiler.source > 8</maven.compiler.source > <maven.compiler.target > 8</maven.compiler.target > </properties > <dependencies > <dependency > <groupId > org.springframework.boot</groupId > <artifactId > spring-boot-starter</artifactId > </dependency > <dependency > <groupId > org.springframework.boot</groupId > <artifactId > spring-boot-autoconfigure</artifactId > </dependency > </dependencies > </project >
1 2 3 4 5 6 7 8 9 10 11 12 13 14 15 16 17 18 19 20 21 22 23 24 25 26 27 28 29 30 31 32 @ConfigurationProperties(prefix = "hello") public class HelloProperties { private String name; private String address; public String getName () { return name; } public void setName (String name) { this .name = name; } public String getAddress () { return address; } public void setAddress (String address) { this .address = address; } @Override public String toString () { return "HelloProperties{" + "name='" + name + '\'' + ", address='" + address + '\'' + '}' ; } }
1
2
3
4
5
6
7
8
9
10
11
12
13
public class HelloService { private String name; private String address; public HelloService (String name, String address) { this .name = name; this .address = address; } public String sayHello () { return "你好!我的名字叫 " + name + ",我来自 " + address; } }
创建自动配置类 HelloServiceAutoConfiguration 1 2 3 4 5 6 7 8 9 10 11 12 13 14 15 16 17 18 19 20 21 @Configuration @EnableConfigurationProperties(HelloProperties.class) public class HelloServiceAutoConfiguration { private HelloProperties helloProperties; public HelloServiceAutoConfiguration (HelloProperties helloProperties) { this .helloProperties = helloProperties; } @Bean @ConditionalOnMissingBean public HelloService helloService () { return new HelloService (helloProperties.getName(),helloProperties.getAddress()); } }
在 resources 目录下创建 META-INF/spring.factories 1 2 org.springframework.boot.autoconfigure.EnableAutoConfiguration=\ cn.itcast.config.HelloServiceAutoConfiguration
通过以上步骤之后,可以通过 mvn install 将自定义的 starter 安装到本地 maven 仓库
使用 starter 创建 maven 工程 myapp 并配置 pom.xml 文件 1 2 3 4 5 6 7 8 9 10 11 12 13 14 15 16 17 18 19 20 21 22 23 24 25 26 27 28 29 30 31 32 33 34 35 36 37 <?xml version="1.0" encoding="UTF-8" ?> <project xmlns:xsi="http://www.w3.org/2001/XMLSchema-instance" xmlns="http://maven.apache.org/POM/4.0.0" xsi:schemaLocation="http://maven.apache.org/POM/4.0.0 http://maven.apache.org/xsd/maven-4.0.0.xsd" > <modelVersion>4.0 .0 </modelVersion> <groupId>org.example</groupId> <artifactId>myapp</artifactId> <version>1.0 -SNAPSHOT</version> <parent> <groupId>org.springframework.boot</groupId> <artifactId>spring-boot-starter-parent</artifactId> <version>2.2 .2 .RELEASE</version> <relativePath/> </parent> <properties> <maven.compiler.source>8 </maven.compiler.source> <maven.compiler.target>8 </maven.compiler.target> </properties> <dependencies> <!--导入自定义的 starter --> <dependency> <groupId>com.pineappleman</groupId> <artifactId>hello-spring-boot-starter</artifactId> <version>1.0 -SNAPSHOT</version> </dependency> <dependency> <groupId>org.springframework.boot</groupId> <artifactId>spring-boot-starter-web</artifactId> <optional>true </optional> </dependency> <dependency> <groupId>org.springframework.boot</groupId> <artifactId>spring-boot-configuration-processor</artifactId> </dependency> </dependencies> </project>
1 2 3 4 5 server: port: 8080 hello: name: xiaoming address: beijing
1 2 3 4 5 6 7 8 9 10 11 12 13 @RestController @RequestMapping(value = "/hello") public class HelloController { @Autowired private HelloService helloService; @GetMapping(value ="/say") public String sayHello () { return helloService.sayHello(); } }
1
2
3
4
5
6
@SpringBootApplication public class HelloApplication { public static void main (String[] args) { SpringApplication.run(HelloApplication.class, args); } }
至此,就完成了 Spring Boot 的 Starter 的创建以及使用